Stuck With Rheem Tankless Water Heater Troubleshooting? [4 Amazing Ways To Fix]

Rheem is one of the most reliable brands when it comes to providing home care solutions to millions of homes all over the world. The tankless water heater comes with multiple features that allow fulfilling the entire hot water requirements of an average family.
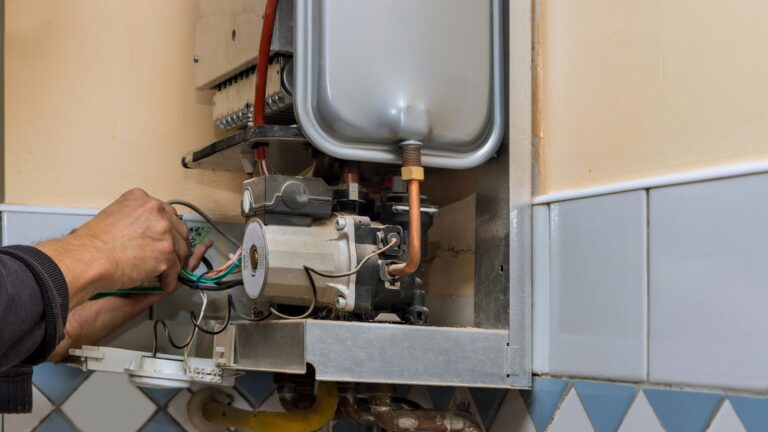
However, since it is an electronic device, you may find some technical difficulties after the warranty period is over. If you are seeing such error codes or the heater not working, it’s time to fulfil an immediate diagnosis for the product.
This will not only help you to bring back the heater to a factory reset position but also find the exact solution for the problem that you are facing with the product. So, let’s start with Rheem tankless water heater troubleshooting.
Rheem Tankless Water Heater Troubleshooting: Error Codes
1. Troubleshooting: Error No Code
What it’s telling you
This happens mainly when the flow rate is low and there is a complete maintenance error. In such a situation, the control board simply displays the current temperature and the heater does not work at all.
The Solution
- The first thing that you need to do is to adjust the flow or the temperature.
- Once you are done, check all the pipelines for both the inlet and outlet connections. Make sure that they do not cross the lines.
- Make sure that there are no technical mistakes while plumbing and you are free to use.
- Try to wash the filter present. There may be some sediment stuck in the inlet filter that is causing the problems. Try to rinse it with clear water.
- Complete a full diagnosis of the flow sensor. You may find multiple problems with it or it may be jammed.
2. Troubleshooting: Error P1
What it’s telling you
This error seems to be very common when there is a situation for maintenance. It is a warning when the water flow is too low. However, in such a situation, the unit may operate but with a lower flow rate.
The Solution
- The first thing that you need to do is to check the water pressure from the aerator. If you feel the pressure is low, try to clean it.
- There may be sediment formation on the filter. So bring out the inlet filter and then wash it thoroughly.
- If you are done, adjust the temperature or the flow rate of the heater. If the flow rate does not increase, try any other temperature that may work.
- If none of the above steps work properly, the only thing left is to inspect the flow sensor. Try to contact a professional if you are not able to do this all by yourself.
3. Troubleshooting: Error 1L
What it’s telling you
Having this error means that it is time for servicing or cleaning your heater. There is a formidable amount of limescale build up in the heater.
The Solution
- The first thing that you need to do is to flush the heat exchanger. If you cannot do it by yourself, try to read the manual and get an exact idea on how to do this.
- The next thing that you need to do is to adjust the altitude settings. The settings must be pre-set at a lower altitude and thus it allows easy build-up of limescale.
4. Troubleshooting: Error 05
What it’s telling you
There may be two major reasons why this error code is showing up. The main reason for this could be a blockage in the bent or the pipes are not properly joined.
The Solution
- If there is a problem with the vent installation, you need to check for the fittings. If you find any spare parts as loose, simply join them to make them sit tightly.
- If there is a blockage on the vent, you need to clear the vent with a blower. Try to remove all the dust particles.
- Now, you need to fit it back again following the installation norms. Make sure that the vent sits properly onto the heater.
- The last thing to do is to check the fan motors. You may find that the fan motors are full of specks of dust and it has become heavy. Clean it and then install it again.
Why Does It Need a Reset?
There are multiple reasons why any tankless heater might require a reset. One of the most common causes of this may be overloading. If there is overloading, even the largest of the tankless units will fail to deliver you the expected requirements for your home.
As a result of this, it will always show an error and will stop working. But to get it back to the original position, trying out a reset on the unit may work for you. The best solution is to follow the procedure to complete a full reset and bring back the configurations to a factory set point or a default setting.
If it is not working with just a reset, you may require contacting a professional. There may not just be a problem with the overflow, but any other spare part of the heater may not be working correctly. As a result of this, adding a second heater may be just the ideal solution for your needs.
Why Do Water Heaters Have a Reset Button?
The reset button in any electric heater works like a recovery. Suppose the heater is stuck at a particular stage and it’s not working after this. Here, the reset function can bring back life to the heater. So having a reset function can be highly beneficial for every home. But at the same time, the reset button helps the heater to run safely and without any problems.
So when the heater is under extreme pressure and comes with overheating, the reset button comes to proper use. Apart from this, there are a few reasons when the reset button might come to work.
1. A Faulty Thermostat
The reset button may come to work when there is a faulty thermostat in place. If this thermostat is not working properly, the heater may not function as well. Because of this, the reset button will activate itself.
2. Loose Connections
The loose connections may happen at any time and it may lead to a fire hazard. Having the reset button here may just be helpful for you to get rid of such dangerous situations. The reset button has multiple sensors that can always trip off when it senses an issue with the wiring of the product.
3. A Poor Heating Element
Another good reason why the reset switch may just be important for your heater is the heating element. In any heater, it is one of the most important parts to consider. Whenever it is not working properly, the heater sends signals to the reset switch and asks it to send an electrical current through the unit to bring back the heating element to work.
How to Re-Light Your Rheem?
When your water heater is not working, there may be some hardware or technical faults. However, it is not at all difficult to consider when you have to turn it on. If you have turned off the system for flushing or cleaning, you can follow the safe steps to turn it back on.
1. The first thing that you need to do is to shut down the valves. Make sure that there are no open gas valves or any type of leaks present around the knobs. Simply turn the knob in a clockwise direction to make sure that you have set it in the off position.
2. The next step that you need to do is to set the thermostat to the lower temperature. If the thermostat is a dial and adjustable feature, you need to rotate it counter-clockwise. This will let it set in the lowest possible temperature and then you have to wait for at least 5 minutes that will allow the gas to pass through.
3. Once you are done with this, you need to remove the outer door. Lift the outer door so that you can reach the gas knob once again. To start the heater, you need to get the gas knob back to the pilot position again.
4. After this, you need to turn on the ignition. This is practically present to the left side of the gas knob. If you look closely, there should be a red button present around the ignition. You can easily hold it down while you press the ignition button present. You should find the ignition sticker around the right side of this knob. So you need to press it down until it turns on. You can check the viewing window.
If you are done with all the steps mentioned above, the heater is almost ready to start. At this point, the water will start to flow in and you need to turn on the gas valve. This will help you to set the temperature to a specific range and then re-light your Rheem.
Conclusion
Rheem tankless water heaters come with a programmable display screen that includes several error codes. Since most of them have a self-diagnosis platform, they display the error code so that it takes less time for you to solve it.
If you are unfamiliar with the error code on display, you can either look at the manual provided or the guide that we have mentioned above. Following the steps will surely help you in Rheem water heater troubleshooting.
If you are still unable to find the relevant information you are looking for, just drop down your comments and let us know here. Do mention which error code your Rheem water heater is displaying.