Hot Water Heater Leaking from Top in 2024? [7 Unusual Quick-Fixes]
If you are experiencing troubles with your water heater, it may never be a good sign for you. You may land into serious trouble if you keep trying to ignore such problems and make the not count. However, water leaking issues from any water heater may be a serious problem that you are not being able to detect.
Before reaching out to any solution, you must diagnose it and try to find out what is the reason behind water leaking for it. However, if you cannot understand what the problem is this article on Hot Water Heater Leaking from Top will help you to find out the exact solution that you were looking for.
Why is Hot Water Heater Leaking from Top?
There are several reasons why the water may start to clog from the top and even may have serious issues. Every water leakage may come up with different signs and symbols. So if you are not a professional in observing, you may have difficulties in getting to the solution.
But with the help of this guide, you can find the exact reasons why this problem is occurring. Below, we have mentioned every possible reason because of which this problem may have occurred. For more information, you can scroll down below.
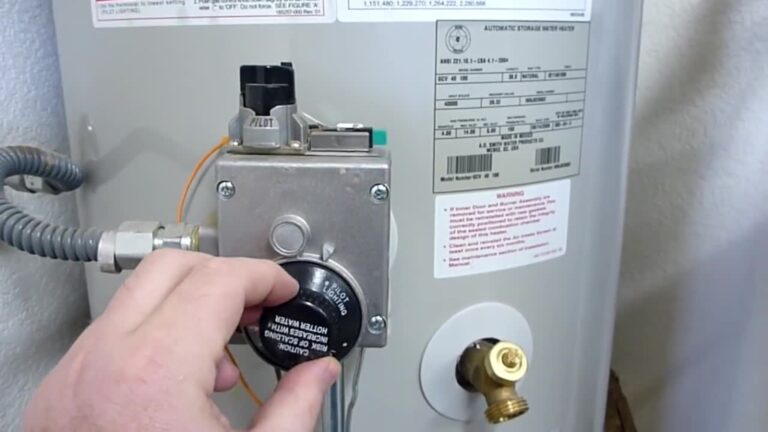
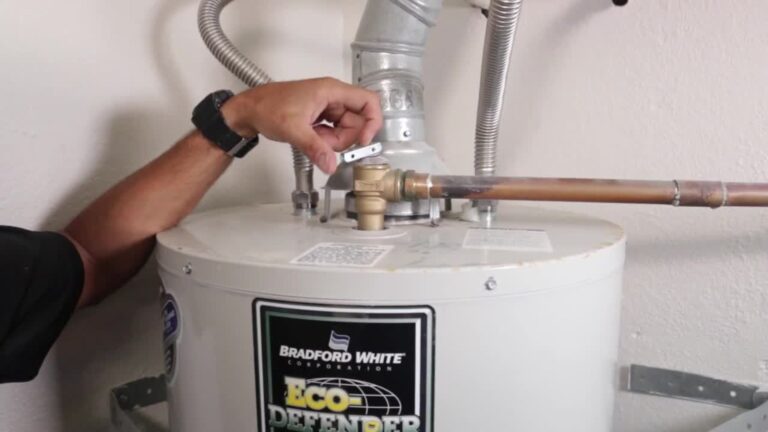
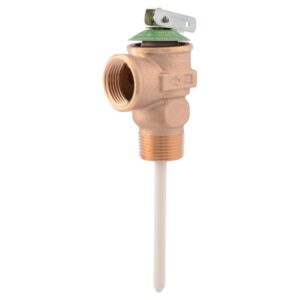
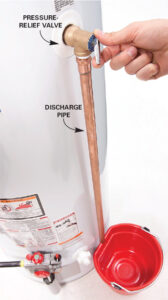
1. Pressure Relieve Valve
Why Is It Leaking?
The Temperature Pressure Release Valve is one of the most important components of a water heater. It helps you a lot to protect your water heater and keep it completely safe from any type of explosions. Apart from this, it can open to a lower the temperature inside the water heater along with reducing the applied pressure.
The temperature valve also allows you to get proper security for your device when your water temperature gets too high. There are several reasons why it may tend to leak out a little bit. Usually, it is present near the top of the water heater and this is the reason why you may feel that there are water droplets formed on the top.
But there are multiple numbers of reasons why the heater may not be working like thermal expansion, water pressure, not perfectly working and many more.
How to Solve the Problem?
- When the water heater has high pressure, this valve is responsible for bringing it down. In fact, it allows you to easily lower the temperature and in this course, the valve may not work properly. So you can check the thermal pressure inside the tank and if you find it to be high, you need to replace the PR valve.
- Look for corrosion options inside the water heater. If you have excessive hard water, it may interrupt the mechanism of the PR valve. In such options, you need to clean the rust present inside the heater. This will allow the PR valve to work properly.
- If the valve is working for a longer time, it is evident that you need to change it. Though the heating element may have a long life, these valves are very sensitive and may work for a limited amount of time.
- If you find the water pressure to be extremely high this may be another reason why the PR valve is not working. In such a case, you need to lower down the input water pressure level and then get along with the product.
- Check for all the water faucets that are open in your home. If they are not properly closed down, it may result in a malfunction of the valve. So try to make sure that it works properly and without any issues.
How To Replace The Pressure Relieve Valve?
If you want to replace the Pressure Relieve Valve, you can always do it with the help of following these simple steps below:
- Check for the power and make sure that the power supply is completely off.
- Now you need to wait for a while to allow the water inside to cool down. Cooling down may take some time, but it is not safe at all to work at a high temperature.
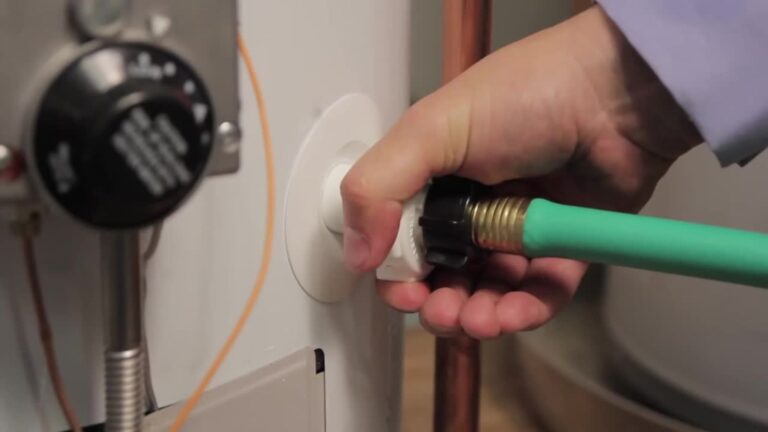
- The next thing that you need to do is to empty the tank. So open up all the hot water faucets connected with the heater and allow the water to flow out.
- If you do not wish to clear all the water, just make sure it is below the valve. Once it is, you now have to unscrew the valve and take it out.
- Check for any other sources of leaks or any rusts formed within the tank. If you find any corrosion or rusts, clear it first.
- Now you need to get a new valve and get it back to the initial position. Try to set a Teflon tape around the threads which will help you to get the best results.
- Once you are done with the fittings, restore the heater to the original position and then you can power it up. This will allow you to get the proper working condition of the heater.
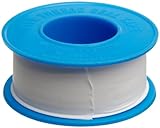
- For Use In Wrapping Pipe Threads To Create Air And Water Tight Connections
- 520" Long, 3/4" Wide, And 3.5 Mil Thick For Multiple Uses. Thickness: .09Mm
- Operating Temperature Range Of -212 To +500 Degrees F
- Color Ptfe Tape
2. Pipe Fittings
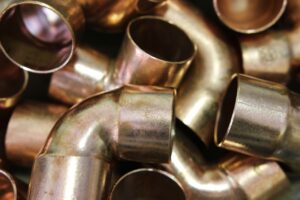
Why Is It Leaking?
One of the primary reasons why you may experience a lot of water droplets on the top of the heater, the one thing that you can consider s to look for the pipe fittings! Because of the pipe fittings, things may get difficult for you at times. So while installing the product, you need to make sure that the pipe fittings are always perfect.
If you are not a professional in installation, it is always important to call someone who is a professional. If the pipe fittings are not done properly, you may face a lot of difficulties such as leaks, drop in the pressure valve and even formation of rusts.
So make sure that the pipe fittings are always proper and you will not have to worry much. However, if you face such an issue, you can follow the steps to fix it.
How to Solve the Problem?
- If you find a loose pipe in the connection, immediately empty the whole water tank and allow all the water to flow out of the heater in no time.
- Open all the hot water faucets which are available and make sure that you empty the pipe. Also, close all the water inlet faucets so that no more leaks are occurring.
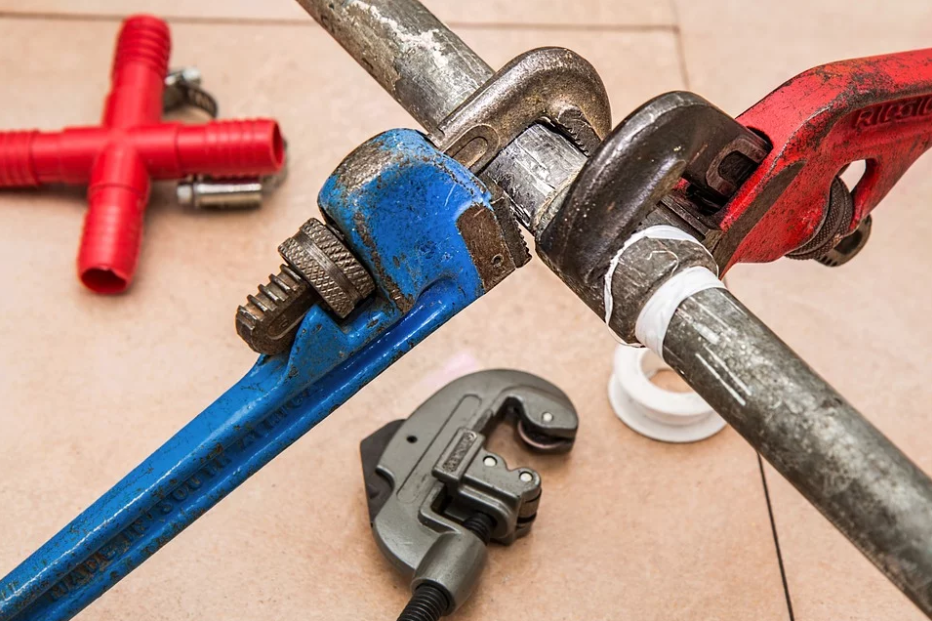
- Try to tighten the pipeline with the help of a wrench. It will only work if the pipe fitting is a bit loose and you need to just tighten it.
- In case, you find any type of corrosion in the pipeline, you need to completely replace the pipe. Just cleaning will not work for you and will get you back to the same result as you were looking forward to having.
- Once you fit in the new pipe, you need to seal it with the help of a Teflon Tape. Sealing it with the help of tape will make sure that there are no more leaks from the mouth.
- For Use In Wrapping Pipe Threads To Create Air And Water Tight Connections
- 520" Long, 3/4" Wide, And 3.5 Mil Thick For Multiple Uses. Thickness: .09Mm
- Operating Temperature Range Of -212 To +500 Degrees F
- Color Ptfe Tape
Replacing the Supply Line
- You need to replace the supply line when you find the dielectric nipples to be completely corroded. The problem maybe because of the tank which may be a bit difficult for you to handle.
- Make sure that you take out the whole of the pipeline and then start to replace it. This will help you to completely get a leak-free tank.
Replacing the Dielectric Nipples
- You cannot just pull out the Dielectric Nipples with your bare and hands and for this; you need the help of external appliances. Choosing a proper gauge will help you to pull them out.
- Pull them out of the base and then replace the Dielectric Nipples with a new one. Make sure that you use a Teflon Tape as a thread to seal the ends.
- Once you are done with the installation, you need to fit it with the supply line and then find out the perfect match. Make sure that you can get a proper fitting to avoid any type of damages.
- For Use In Wrapping Pipe Threads To Create Air And Water Tight Connections
- 520" Long, 3/4" Wide, And 3.5 Mil Thick For Multiple Uses. Thickness: .09Mm
- Operating Temperature Range Of -212 To +500 Degrees F
- Color Ptfe Tape
3. Overflow Pipe
Why Is It Leaking?
The Overflow Pipe is a hard metallic pipe that runs from the interiors of the hot water tank to the drain pipe. The main function of this pipe is to flow out the excess water inside the tank. So it works in direct co-ordination along with the Temperature and Pressure valve.
But since it is quite sturdy for all the heaters, it is very hard to conclude that you have a leakage in the overflow pipe. Because of this, we suggest that you may have a damaged TP valve which is causing the overflow problem. So you need to get the TP valve fixed.
How to Solve the Problem?
- You need to empty the full tank and allow it to cool down. Working with completely hot water may just be dangerous for you.
- Make sure that all the electrical connections are closed. Now you need to open all the hot water faucets which will allow you to cool the water present.
- Once it cools down, you need to take out the TP valve and examine it. If it has some rusts, clean the valve properly and then run it again.
- If it is damaged, you need to get a new valve and replace it. Make sure that you are adding a Teflon Tape just like a thread to get a better hold of the valve.
- For Use In Wrapping Pipe Threads To Create Air And Water Tight Connections
- 520" Long, 3/4" Wide, And 3.5 Mil Thick For Multiple Uses. Thickness: .09Mm
- Operating Temperature Range Of -212 To +500 Degrees F
- Color Ptfe Tape
4. Cold-Water Valve
Why Is It Leaking?
The Cold-Water Valve is a very important part of the water heater as it allows the cold water to flow into the heater without any issues. If the Cold-Water Valve is not working properly, there will be no water incoming to the heater tank.
As a result of this, you may even spot water droplets forming on top of the heater. This is the reason why you need proper maintenance of your product without much delay. There may be several reasons for the cold water valve not working.
It may be because of some blockage in the Cold-Water Inlet or some low pressure of water flow into the tank. Since the valve is located directly on top of the heater tank, you can notice these water droplets being formed.
How to Solve the Problem?
To solve this problem, you may have to follow the steps mentioned below.
- Try to empty the tank completely and so close all the cold water inlet options. Allow some time for the water inside to cool down and then you can start.
- Once it cools down, make sure that the heater is completely switched off. Now you can open all the hot water faucets to empty the tank.
- After this, you will now have to open up the tank and then locate the Cold-Water Valve. It is just present above the tank and the pipe is also not hot. So you can go with your bare hands.
- If you find it to be lose fitting, try to use a wrench to tighten the valve. You can also take the help of a screwdriver and then tighten the nut to make it stable.
- If this process does not work, you may have a faulty Cold-Water Valve which you need to replace. So get a new valve and install it.
- Make sure that the new valve sits tight and then it passes the cold water. If your pipe is not clean, just clean it once and then run the product. This will help you to work properly with the heater.
If still your problem is not solved you check this detailed post on Water Heater Leaking from Cold Water Inlet.
5. Anode Rod
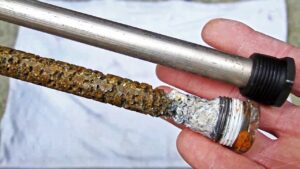
Why Is It Leaking?
The Anode Rod is an important safety feature for the water heater thank that almost every heater includes. Most of the heaters are made up of a durable and stainless steel tank.
This material reduces the amount of corrosion formed in the tank. But if you live in a locality which is dominated by hard water, you must keep maintaining the heater to avoid such troubles.
The Anode Rod is located from end to end of the heater and if it is not working properly, you may find water droplets formed on top of the heater in no time. The basic function of this rod it to clean the water from the contaminants to protect the tank.
How to Solve the Problem?
The design and the structure of the Anode Rod are made in such a way that it allows sacrificing the rod to protect the heater from any type of explosion or any type of contamination. So if you find that the Anode Rod is not working properly, it is because of the job that it does.
In such a case, you must change the rod completely because it is of no more use. You can also follow these steps below if you wish to get to replace the Anode Rod.
- If this is the first time that you are changing the interior components of a water heater, we suggest you get a professional that will do the job for you.
- You need to empty the tank to work in the interiors of the tank. Make sure that the water stays cool to work with the anode rod.
- Next up, you need to find the screw positions which are present at either end of the rod. With the help of a screwdriver, just unscrew the rod and then you can take it out.
- Now, you need to simply get a new Anode Rod to replace the old one. Make sure that the new rod does not have any type of leaks present inside the rod so that you do not have to change the rod again.
6. Drain Valve
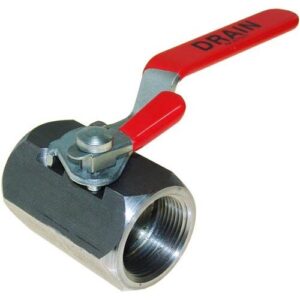
Why Is It Leaking?
The Drain Valve can also be another reason why you may be facing water leaking conditions in the heater. Most of the Drain Valves are either made up of plastic or metal. The Metal type of the Drain Valve is much more durable and may come up with some washers.
However, there are many advantages of having the metallic Drain Valve over the plastic ones. It allows you to get washers that keep the Drain Valve safe. The main function of the valve is to maintain the bridge as a junction between the drain pipe and the inlet water tank.
How to Solve the Problem?
It is never easy for anyone to change a Drain Valve and then use it. If you are facing this issue because of corrosion, you simply need to replace it and then get a new drain valve. If your drain valve is plastic, you may have not got any washer.
It is more evident that in such a case, you need to have a proper replacement. So try to go for the metallic ones which will reduce the chances for any type of corrosion. However, you can follow these steps below to know more.
- Try to remove the Drain Valve with the help of hand pressure only. Do not open forcibly as this may cause the valve to break away. If it breaks then you need to get a new one.
- With the help of hand pressure, turn the Drain Valve for four rotations in a counter-clockwise motion. This will allow you to lose up the valve.
- Next up, you need to pull out the Drain Valve so that you can release it from the tank. You may need to apply a little pressure while pulling it out of the tank.
- Once it is out, you can get a new valve and restore to the initial position. Make sure that the Drain Valve sits tight as a junction. Now you can run the product and your problem will be resolved.
7. Expansion Tank
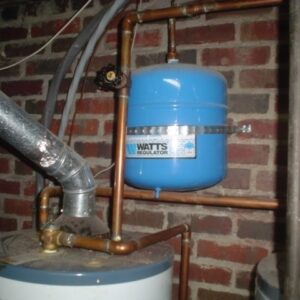
Why Is It Leaking?
The Expansion Tank is another secondary tank that is present in some selective water heaters with high capacity. It is designed to save space and thus is located on the top half of the heater. If there is any type of overflow in the Expansion Tank, you may face water leaking problems and experience the same from the top.
This device is specifically made to absorb the hot water which is not required by the primary tank. So mechanically, it works just like the TP valve. If the TP valve is not working properly, the temperature and the pressure inside becomes very high.
As a result of this, the hot water gets stored at the Expansion Tank. But because of this temperature, it can easily damage the valves as well as the joints. This will cause an excessive leak from the top.
How to Solve the Problem?
Before you opt to solve the problem, you must know about why the Expansion Tank is present in your tank and how the leak has happened. So getting on to the link, there are three different reasons which you may have to count upon. They are the air valve, the tank, and the connection.
A. Air Valve
The air valve is responsible to create a vacuum inside the tank so that only water can enter the tank. If the air valve is not working, it will create more pressure. As a result of this, you may face excessive issues in water leaking.
B. The Connection
The connection is an important part. Since both the Expansion Tank and the regular tank is connected with the help of a regular temperature pressure valve. If it is not working properly, the water leaking will occur around the Expansion Tank.
C. The Tank
Because of hard water and also minute leaks present around the Expansion Tank, you may face several issues that may initially lead to leaking around the product. So it is important that you to choose a product which will have easy maintenance.
However, if you wish to fix the issue with the help of proper support, you can always follow these steps below to get the best results.
- Empty the tank and allow the hot interior tank to be cool down. Make sure that you can get the proper cool tank to work with.
- Now you need to locate the Expansion Tank present just above the primary tank. Simply remove the tank from the connection point.
- Check for all the possible leaks present around the Expansion Tank and repair them. Try to use a thread to make sure that you can seal all the parts.
- Once you are done with this, you now have to look for re-installing the Expansion Tank back to the original position. This will help you to get the best results from the Expansion Tank.
8. Other Factors
Unusually, any water heater comes up with most of the components which are listed above. However, there may be chances for external causes. Yes, sometimes, there are such external factors which may just be affecting the main inlet tank from getting affected.
Generally, if you live in an extreme climatic locality, such issues may seem to be regular for you. But with the help of a proper detection, you can get rid of such regular leaking problems. So below, we have discussed the two possible conditions.
A. Rain Water
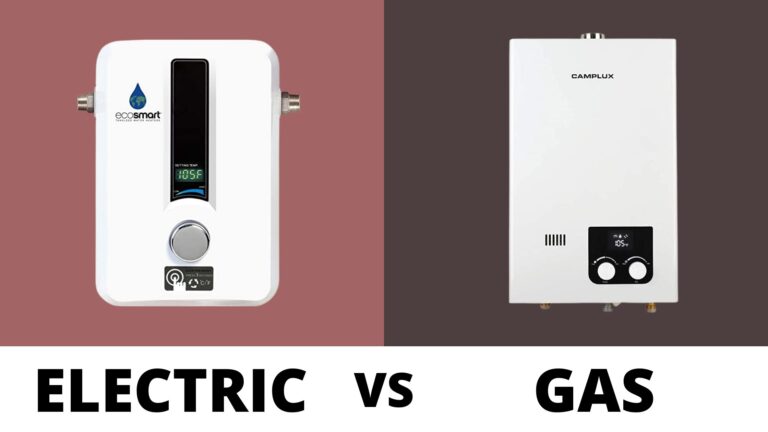
The rainwater may have a big impact if you are facing the issue regularly. If you are staying in an area with heavy rainfall and the water drops are all around the walls, it may fall down the vent pipe. This is more possible in case of a gas water heater but not an electric one.
Because of this, it may just be difficult for you to keep maintaining the product and also stop the water overflow. The water will tend around to be collected on top of the heater and will affect directly on the heater. The only option to get rid of this is to get an electric tankless water heater instead of a gas heater.
B. Condensation
Another reason why there may be frequent leaks from the top is just because of the condensation factor. When your heater starts to condense, you may see water droplets formed on the sides as well as the top of the heater. This does not mean that you need to worry about the heater.
It may be because the product is not being able to meet up the hot water demands in your home. However, try to close all the electrical power inputs of the heater and then clear the heater from the sides.
Conclusion
Getting water leaks continuously from the heater is never a good sign and this is the reason why you must keep maintaining your water heater. However, if you are facing such issues, you need to try any of the above methods one by one. We also have a post on hot water heater leaking from bottom.
It is very important to detect the problem before you can diagnose what is wrong with the water heater. But if none of the methods from this article on Hot Water Heater Leaking from Top work for you, it is evident that you have a serious problem. You may have to contact a professional or even look to replace the heater.