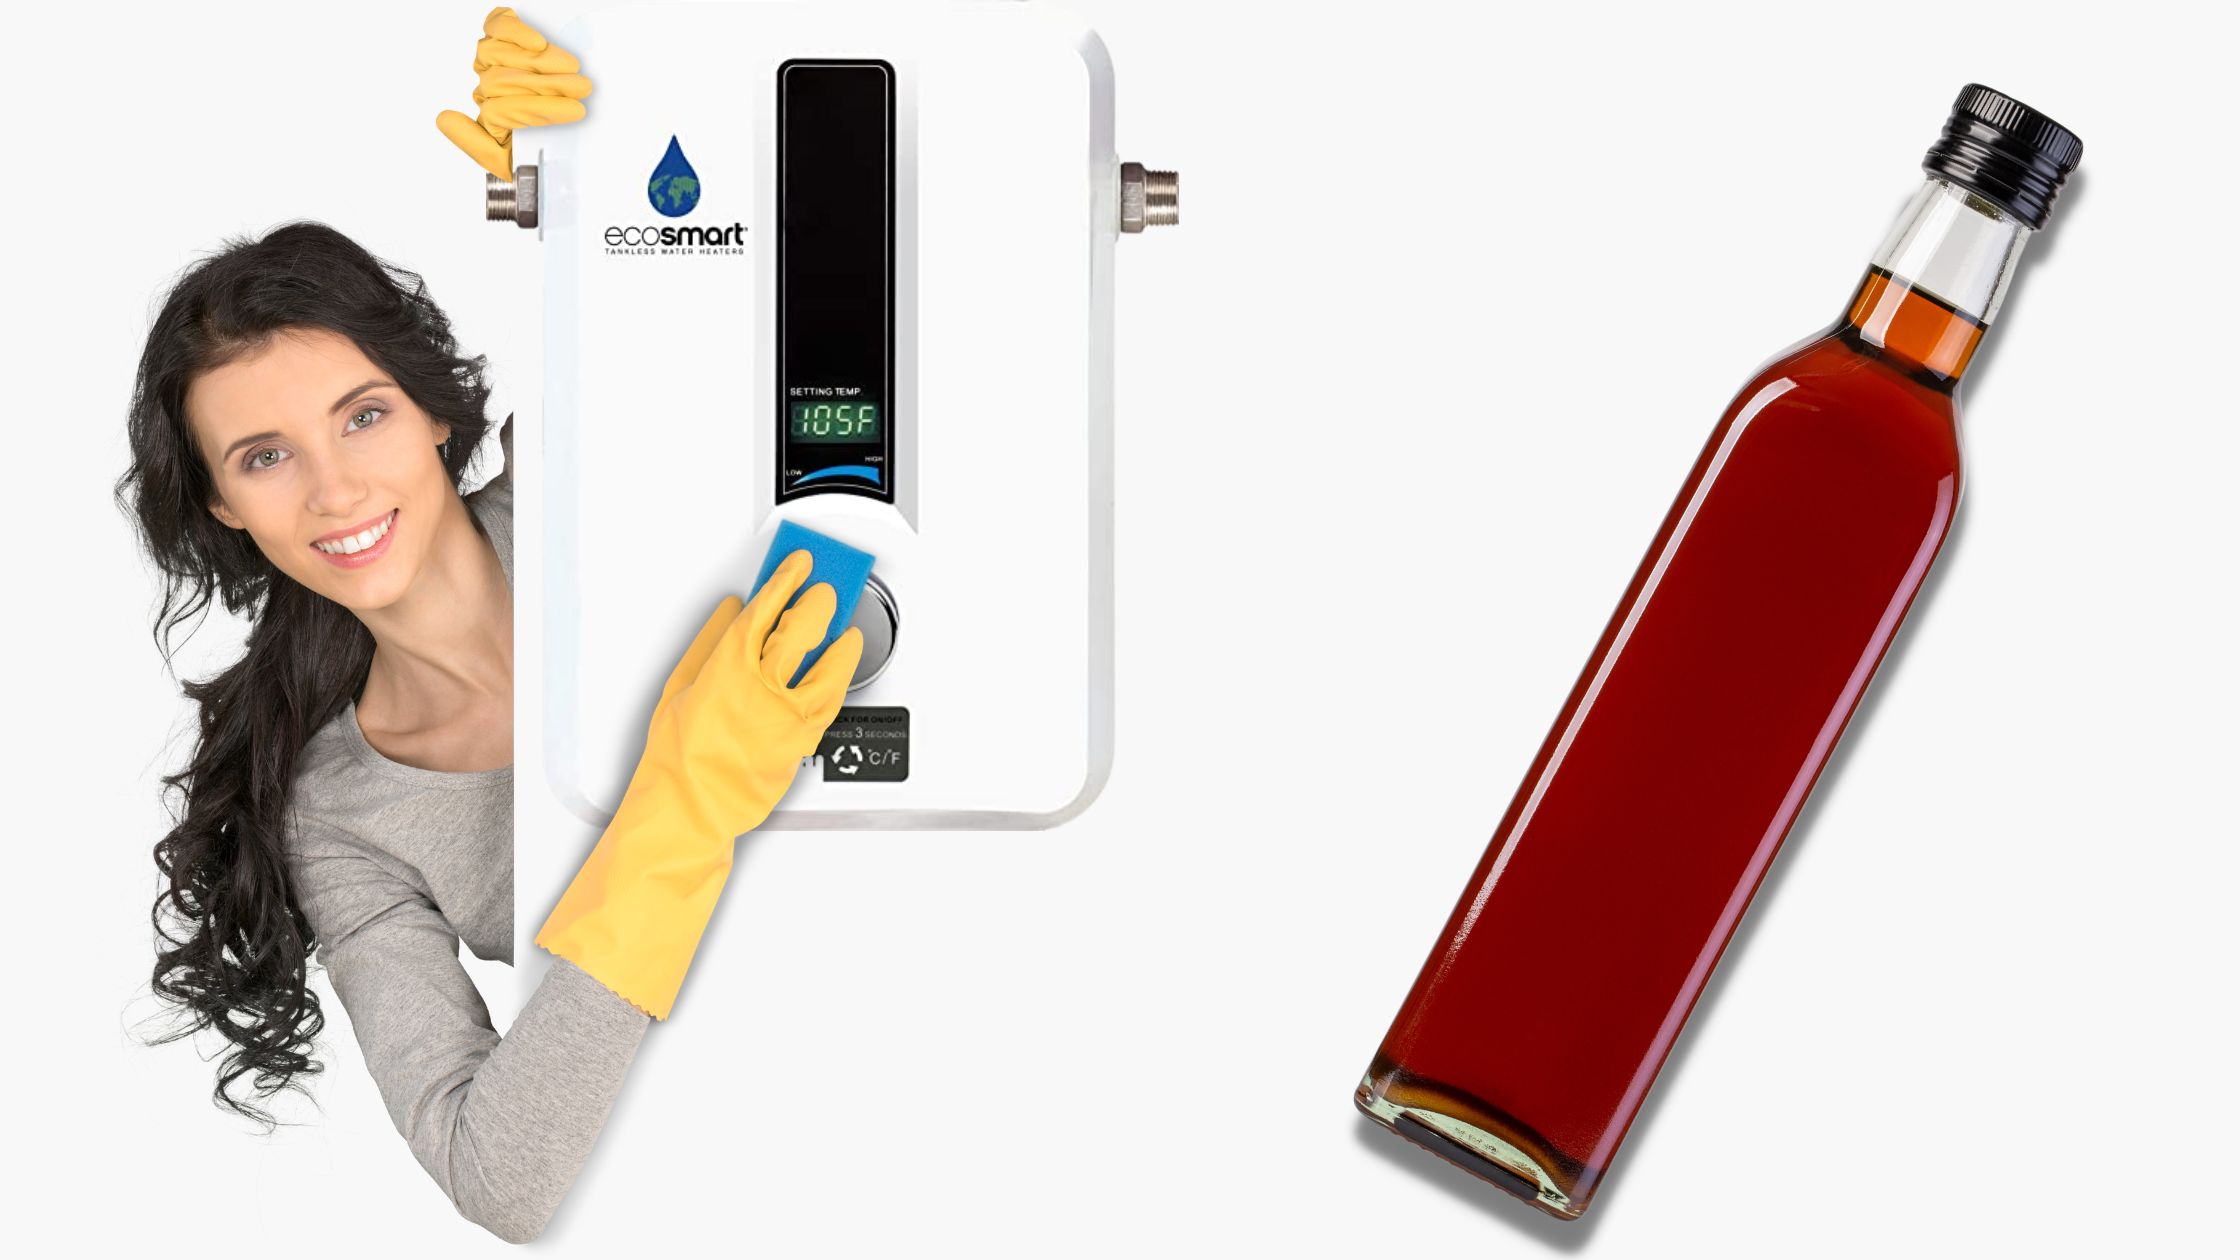
How to Clean Hot Water Heater with Vinegar?
To make sure that your house is effectively using water and energy, you can check whether the tank in which you boil the water is working properly or not. Sometimes things like calcium, lime, and other material get deposited on the bottom of the tank that makes the tank to do its job harder to warm the water.

To reduce this mineral that built up you need to flush the water tank. If this is not enough then you can dissolve vinegar to the water tank. This helps to clean the deposited materials more easily. So, here is a complete guide on how to clean hot water heater with vinegar.
For cleansing the water tank from vinegar, follow the steps given below:
- Funnel
- Bucket
- Hose
- Towel
- 1-4 gallons of vinegar
- Wrench
- And Teflon tape

- TANKLESS WATER-HEATING CLEANING KIT: The My PlumbingStuff Tankless Water Heater Flushing Kit is perfect for maintaining any tankless-style water heater. It includes 5-foot SS hoses, a 32-ounce bottle of FLOW32 Descaler, a Zoeller 42-0007 Floor Sucker pump, and a 5-gallon bucket.
- HELPS MAINTAIN EFFICIENCY: This tankless water-heater flushing kit should be purchased with every new or existing tankless water-heater system. By flushing the water heater as recommended by the manufacturer, you’ll ensure optimal efficiency, reduce debris buildup, and improve the quality of water.
- J.C WHITLAM FLOW32 DESCALER: FLOW-AIDE is a nonhazardous, noncorrosive, nontoxic, and biodegradable descaler that is heavily fortified with wetting and penetrating agents that actually dissolve water scale, lime, mud, rust, and other water-formed deposits from portable water-heater and tankless systems.
- EVERYTHING YOU NEED: This tankless water-heater cleaning kit includes everything you need to fully maintain your water-heating system. It comes with step-by-step instructions that are easy to follow, and it connects easily to the tankless isolation valves using the supplied 5-foot SS hoses.
- OVER 100 YEARS OF QUALITY-DRIVEN PLUMBING SOLUTIONS: At My PlumbingStuff, we have real plumbing and heating experts working behind the scenes to bring you the most trusted products for your home’s DIY needs. We offer indoor and outdoor fixtures and have proudly been a 4th-generation family business within the plumbing industry for over 100 years.
How to Clean Hot Water Heater with Vinegar? [Step-by-Step]
Ahead of starting to clean the water tank, make sure that all the parts are working properly and only the cleaning should be done. If something other than deposition of materials is hampering the water tank to warm water, then call a technician or plumber to fix your water tank.

Stage 1: Removal of the Anode from the Water Tank
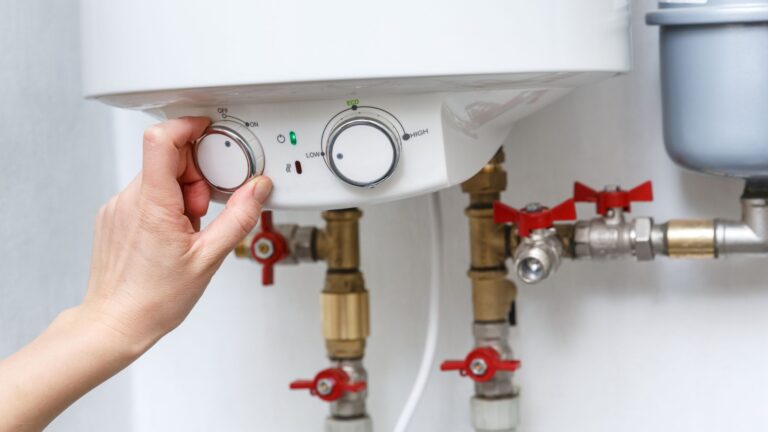
Step 1: Turn Down the Power Supply
Turn the power supply off before doing anything. Do it from your home circuit break which runs the power supply to the tank.
Step 2: Open the Water Taps
Drain the water from the water tank by opening the faucet in your house. This helps in not building a vacuum inside the system. To minimize the water wastage, turn the faucet to the low. It should be low enough to move all the water through the tank. To perform the next steps make sure that you leave the faucet on. This is only for the first part.
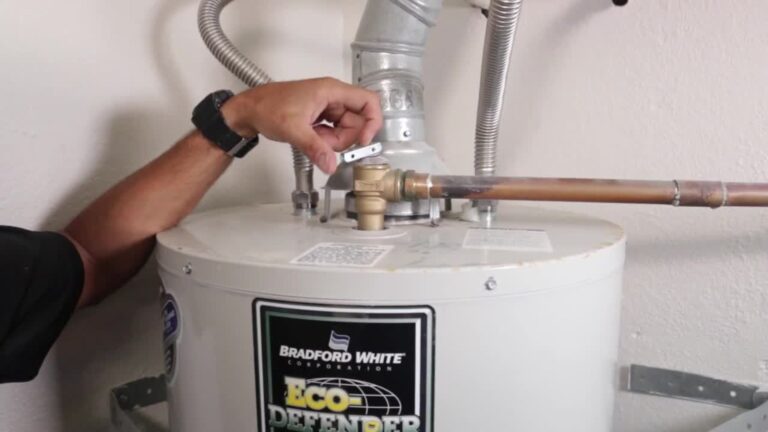
Step 3: Connect a Pipe to Drain Duct
Attach a hose, the drain valve of the tank and keep it either outside the house or inside the bucket.

- EXTREMELY FLEXIBLE - All weather flexibility
- EXTREMELY DURABLE - Abrasion resistant outer cover and crush resistant anodized aircraft aluminum fittings
- HYBRID POLYMER - Won't kink under pressure, coils easily and lays flat with zero memory
- LIGHTWEIGHT - Lighter than traditional garden hoses making Flexzilla easier to carry and maneuver around the yard
- LEAK FREE CONNECTIONS AND DRINKING WATER SAFE - A durable O-ring provides long lasting leak free connections and feature an inner tube material that is drinking water safe
Step 4: Switch Off the Supply of Cold Water
Make sure the supply line of cold water will be located on the top of the water tank. Take a lever and try to turn it off.
Step 5: Drain the water out from the Tank containing Hot water

After turning the power off, turning the faucet on and attaching the hose and turning down the water supply. Now it is the time that you drain the water from the water tank partially. Turn on the drainpipe on the lowest part allow it to drain at least 3 buckets of water.
This is a useful quantity of water. When draining the bucket turn off the valve every time. Once you have drained some amount of water you can close the faucet of your home.
- TANKLESS WATER-HEATING CLEANING KIT: The My PlumbingStuff Tankless Water Heater Flushing Kit is perfect for maintaining any tankless-style water heater. It includes 5-foot SS hoses, a 32-ounce bottle of FLOW32 Descaler, a Zoeller 42-0007 Floor Sucker pump, and a 5-gallon bucket.
- HELPS MAINTAIN EFFICIENCY: This tankless water-heater flushing kit should be purchased with every new or existing tankless water-heater system. By flushing the water heater as recommended by the manufacturer, you’ll ensure optimal efficiency, reduce debris buildup, and improve the quality of water.
- J.C WHITLAM FLOW32 DESCALER: FLOW-AIDE is a nonhazardous, noncorrosive, nontoxic, and biodegradable descaler that is heavily fortified with wetting and penetrating agents that actually dissolve water scale, lime, mud, rust, and other water-formed deposits from portable water-heater and tankless systems.
- EVERYTHING YOU NEED: This tankless water-heater cleaning kit includes everything you need to fully maintain your water-heating system. It comes with step-by-step instructions that are easy to follow, and it connects easily to the tankless isolation valves using the supplied 5-foot SS hoses.
- OVER 100 YEARS OF QUALITY-DRIVEN PLUMBING SOLUTIONS: At My PlumbingStuff, we have real plumbing and heating experts working behind the scenes to bring you the most trusted products for your home’s DIY needs. We offer indoor and outdoor fixtures and have proudly been a 4th-generation family business within the plumbing industry for over 100 years.
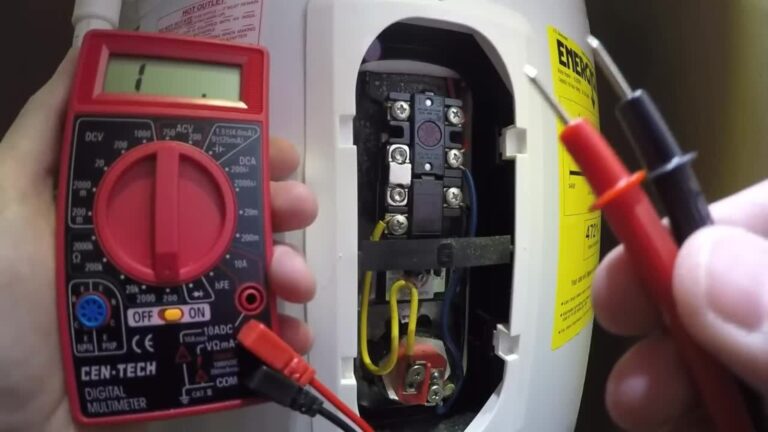
Step 6: See the rod of an Anode in the Water Tank

After following the above steps, if you have reached here, then it is the time for the removal of the rod. Anode rod is actually an atoning metal that helps in preventing the building of rust inside the tank. It is placed on the crest part of the tank. In some cases, it is fixed into the covering of the tank.
In this case, you are required to remove this cover with the screwdriver for obtaining the way to the rod. The bolt is located on the top of the tank which should be in hexagonal shape

- Anode rod for hot water heater: If you’re using a water heater tank, you should keep in mind that its interior is always subjected to the corrosive action of oxygen and other elements. To prolong its life and save your money and time, we offer the perfect solution.
- Safety comes first: RV water heater anode rods are made from superior quality, extra-durable magnesium guaranteed to withstand the test of time. Our products are 100% safe for the entire family.
- Compatibility: These anode rods are 9.25” long, ¾” NPT threads and are compatible with Suburban 232767 and Mor-Flo water tanks. The rods use a 1-1/16 inch socket.
- Longer life: Anode rod for hot water heater RV work great at attracting corrosive elements, protecting your water heater, and prolonging its life.
- 2 anodes in one set: The kit includes 2 magnesium anode rods and a PTFE tape, all set for fixing up your water heater tank and optimizing its functionality.
Step 7: Removing of the Anode Rod

If you have located the anode rod, it’s the time to take out it from the water tank. Take the wrench and loosen the screws. Do this process until you will be able to take out the rod easily. Make sure that rod can be falling apart or had eroded from many places.
It is not delicate so you can take out very easily. You may use the socket wrench according to the size. Usually, 1 or 1/16 inch wrench is used for removing the anode rod. If your shower has stopped giving hot water then you maybe you can check the thermocouple for cleanliness.

- When choosing an RV anode rod, consider the nut type based on water conditions. Steel nuts suit softer water, while galvanized nuts offer better durability in harsh, mineral-rich environments. Also, pick the right rod size: Suburban models need a 9.25" x 3/4" NPT rod; Atwood models require a 4.5" x 1/2" NPT rod. Don’t overlook these essentials for your water heater!
- Feeling Chilly? Time to Upgrade! Your anode rod for hot water heater RV might be waving the white flag. Upgrade with our Suburban anode rod for RV water heater, perfect for models SW6DE, SW10DE, SW12DE—because nobody likes unexpected cold showers.
- Don’t Let Corrosion Ruin Your Cozy Camper: A corroded camper anode rod water heater can turn your warm RV into a cold, unwelcoming space. Our RV anode rod acts as your knight in shining armor, battling tank corrosion to secure your comfort. Bonus: Your RV will be the warmest on the block!
- Our Magnesium is composed of 99.9% pure magnesium. The Best Choice for RVing: Our magnesium anode rod offers superior protection for your RV hot water tank anode rod, especially in the varied water conditions often encountered on the road. Unlike aluminum or zinc, which can corrode quickly, magnesium is more effective at drawing corrosive elements away from the tank.
- Superior Corrosion Protection for Suburban Water Heaters: Designed specifically for Suburban water heaters, our RV water heater anode rod with a 9.25” x 3/4” NPT rod offers unmatched defense against rust and corrosion. It sacrifices itself to protect your tank, ensuring reliable hot water on every adventure.
Stage 2: Vinegar to the Tank containing Hot Water
Step 1: Pour the Vinegar into the Anode Rod

By this time you may have taken out the anode rod. Take a funnel and put it on the opening of the anode rod and gently pour the vinegar inside the tank containing hot water, after you have completed, detach the funnel to keep it aside.
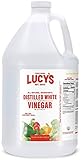
- LUCY’S NATURAL COMPOSITION - Lucy’s White Vinegar's reputation as a trusted product stems from its safety, effectiveness, versatility, and eco-friendliness. Made from fermented ethanol, it contains acetic acid, a naturally occurring compound. Its formulation allows it to be used around food and the home. Additionally, white vinegar is biodegradable and does not contribute to environmental pollution, offering a more sustainable cleaning option by reducing reliance from other cleaning agents.
- SPICING UP DIPPING SAUCES - Lucy’s White Vinegar can add a tangy kick to dipping sauces. Its acidity helps balance flavors and can enhance the overall taste. For instance, a splash of Lucy’s Vinegar can brighten up a mayonnaise-based dip or give a zesty edge to a mustard sauce.
- SUBSTITUTE FOR SALT OR BUTTERMILK - Lucy’s White Vinegar can be a useful alternative when you’re out of salt or buttermilk. For example, you can use vinegar to add acidity to dishes in place of salt or mix it with milk to create a buttermilk substitute for baking.
- ALL-PURPOSE CLEANER - Lucy’s White Vinegar is a powerful, natural cleaner that can tackle a variety of household tasks. It’s effective at cutting through grease, removing grime, and purifying surfaces. Mix it with water to create a versatile cleaning solution for countertops, floors, and appliances.
- 100% FAMILY OWNED, FOUNDED AND OPERATED - Lucy’s was established in 2003 by Miguel and his wife. They both share 4 wonderful kids who have all worked for the family business since then! Miguel’s family immigrated from Mexico to California and began creating products for the Hispanic market in Los Angeles. Since then, Lucy’s has seen national expansion and began developing state of the art organic and non-GMO products for consumer’s in the United States.
Step 2: Place the Anode rod back in the Water Tank
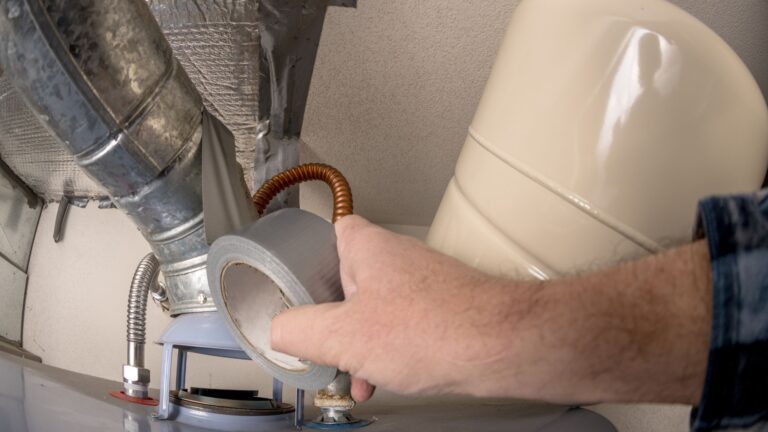
Now take the anode place it back from where it was removed. Use the socket wrench to put it back into the place. Put the Teflon tape around the channel of the anode rod which would help in the airtight fitting of the rod. Teflon tape should be applied at the end of the rod.
Step 3: Add water inside Anode in the Hot Water Tank
Add some cold water in the tank containing hot water after placing the Anode inside it. Set the cold water on the water tank for a short duration. This will not fill up the tank bit will help in the movement of vinegar inside the tank.
Step 4: Wait for Some Hours
After making the vinegar-water solution, wait for 6 hours after, which the solution takes time to remove the deposited materials and loosen them that have build up over time. Make sure you tell your family members that the hot tank containing water is not working for today before starting all these procedures.
Step 5: Drain the Solution Out
After the completion of the above step, it is the correct time to pour out the water tank. Turn the faucet on and open the drain pipe which is present at the bottom of the tank. Make sure that you connect the hose to the drain pipe and keep the opposite side inside the bucket.
It may happen that the deposits that are inside the tank will start coming out and block the hose. So, in this case, you should use your palms to press the hose till the deposits come out of the line. Once this process is complete you are ready to fill the tank again.
- TANKLESS WATER-HEATING CLEANING KIT: The My PlumbingStuff Tankless Water Heater Flushing Kit is perfect for maintaining any tankless-style water heater. It includes 5-foot SS hoses, a 32-ounce bottle of FLOW32 Descaler, a Zoeller 42-0007 Floor Sucker pump, and a 5-gallon bucket.
- HELPS MAINTAIN EFFICIENCY: This tankless water-heater flushing kit should be purchased with every new or existing tankless water-heater system. By flushing the water heater as recommended by the manufacturer, you’ll ensure optimal efficiency, reduce debris buildup, and improve the quality of water.
- J.C WHITLAM FLOW32 DESCALER: FLOW-AIDE is a nonhazardous, noncorrosive, nontoxic, and biodegradable descaler that is heavily fortified with wetting and penetrating agents that actually dissolve water scale, lime, mud, rust, and other water-formed deposits from portable water-heater and tankless systems.
- EVERYTHING YOU NEED: This tankless water-heater cleaning kit includes everything you need to fully maintain your water-heating system. It comes with step-by-step instructions that are easy to follow, and it connects easily to the tankless isolation valves using the supplied 5-foot SS hoses.
- OVER 100 YEARS OF QUALITY-DRIVEN PLUMBING SOLUTIONS: At My PlumbingStuff, we have real plumbing and heating experts working behind the scenes to bring you the most trusted products for your home’s DIY needs. We offer indoor and outdoor fixtures and have proudly been a 4th-generation family business within the plumbing industry for over 100 years.
Step 6: Refilling of the Tank
After the draining process is completed, turn off the draining valve and make sure that all taps are closed. Now turn the cold water on and for letting the tank to complete the remaining work.
Step 7: Turn on the Power of the Tank containing Hot Water
Once completed with all the above steps it’s the time to go back to the house circuit and turn on the power supply of the tank.
Easy, wasn’t it? In case, you are not sure that you will be able to perform all these tasks on your own, call the professional technician to do it for you.
How Do I Drain My Tankless Water Heater?
- TANKLESS WATER-HEATING CLEANING KIT: The My PlumbingStuff Tankless Water Heater Flushing Kit is perfect for maintaining any tankless-style water heater. It includes 5-foot SS hoses, a 32-ounce bottle of FLOW32 Descaler, a Zoeller 42-0007 Floor Sucker pump, and a 5-gallon bucket.
- HELPS MAINTAIN EFFICIENCY: This tankless water-heater flushing kit should be purchased with every new or existing tankless water-heater system. By flushing the water heater as recommended by the manufacturer, you’ll ensure optimal efficiency, reduce debris buildup, and improve the quality of water.
- J.C WHITLAM FLOW32 DESCALER: FLOW-AIDE is a nonhazardous, noncorrosive, nontoxic, and biodegradable descaler that is heavily fortified with wetting and penetrating agents that actually dissolve water scale, lime, mud, rust, and other water-formed deposits from portable water-heater and tankless systems.
- EVERYTHING YOU NEED: This tankless water-heater cleaning kit includes everything you need to fully maintain your water-heating system. It comes with step-by-step instructions that are easy to follow, and it connects easily to the tankless isolation valves using the supplied 5-foot SS hoses.
- OVER 100 YEARS OF QUALITY-DRIVEN PLUMBING SOLUTIONS: At My PlumbingStuff, we have real plumbing and heating experts working behind the scenes to bring you the most trusted products for your home’s DIY needs. We offer indoor and outdoor fixtures and have proudly been a 4th-generation family business within the plumbing industry for over 100 years.
If you want to drain the tankless water heater, you must take care of every safety measure before doing so. This will help you to proceed further without any chances of damage. You can follow the steps mentioned below.
- Make sure to turn off the entire electrical circuit. You can start with powering off the plug and then remove the breaker. If it is a gas-based heater, try to rotate the gas to an off position.
- The next thing is to uncover the plate. You can take the help of a screwdriver to do so. Check there are no electrical connections in place and you can move forward.
- The next step is to turn off the water supply valve. Take out the cold water supply and then turn off the hot-water supply faucet to avoid any mixture.
- Once you are done, you need to connect a long hose to the outlet valve. The hose should be long enough to connect it to a drain or a pond nearby where you can flush the heater.
- Now you need to take the help for a pump and then place the hose into a bucket. You can pour in freshwater into the bucket that will include a mixture of vinegar.
- The next step is to open the isolation valves. Make sure to open both hot and cold water faucets. Now you have to turn on the pump to allow the water to flow into the heater.
- After this, you need to repeat the process of pumping in the water for 15 minutes for at least 45 minutes. Do it till the bucket is empty and after that, close the cold water valve.
- Now you have to connect one end of the hose back to the bucket. You can start by turning on the cold water supply and let the water flow out of the heater.
- Remove the filter that is present inside the tank. If it is a tankless heater, there should not be any external filter. You may have to rinse it a little to remove all the sediments present.
- The next step is to create a vacuum. You can do this by opening both the hot and cold water lines. Simply open the taps and let the water flow out for a few minutes. Once it is done, clone them.
- The flushing is complete and now you have to look over the connections. Turn on all the supply valves and secure the pipes so that there are no leaks.
When Do I Want to Flush My Hot Water Heater?
To be honest, there’s no specific timing for when you need to flush out the water heater. This all depends on the locality and the type of sediments formed in your water heater.
Since it’s not easy to open up your tank, you can judge the water health by testing out the filter from any water purifier. Strong sediments and rusts can easily damage the internal components of the heater.
So if you clean the purifier filter for every six months, do the same for your water heater as well. This will help to keep the heater safe from any type of damages.
Should I Drain My Water Heater Periodically?
- TANKLESS WATER-HEATING CLEANING KIT: The My PlumbingStuff Tankless Water Heater Flushing Kit is perfect for maintaining any tankless-style water heater. It includes 5-foot SS hoses, a 32-ounce bottle of FLOW32 Descaler, a Zoeller 42-0007 Floor Sucker pump, and a 5-gallon bucket.
- HELPS MAINTAIN EFFICIENCY: This tankless water-heater flushing kit should be purchased with every new or existing tankless water-heater system. By flushing the water heater as recommended by the manufacturer, you’ll ensure optimal efficiency, reduce debris buildup, and improve the quality of water.
- J.C WHITLAM FLOW32 DESCALER: FLOW-AIDE is a nonhazardous, noncorrosive, nontoxic, and biodegradable descaler that is heavily fortified with wetting and penetrating agents that actually dissolve water scale, lime, mud, rust, and other water-formed deposits from portable water-heater and tankless systems.
- EVERYTHING YOU NEED: This tankless water-heater cleaning kit includes everything you need to fully maintain your water-heating system. It comes with step-by-step instructions that are easy to follow, and it connects easily to the tankless isolation valves using the supplied 5-foot SS hoses.
- OVER 100 YEARS OF QUALITY-DRIVEN PLUMBING SOLUTIONS: At My PlumbingStuff, we have real plumbing and heating experts working behind the scenes to bring you the most trusted products for your home’s DIY needs. We offer indoor and outdoor fixtures and have proudly been a 4th-generation family business within the plumbing industry for over 100 years.
Doing anything out of a regular habit always keeps any electronic device in good health and especially for a water heater. Because of sediments and contamination, the rust particles flow inside the tank and start to erode the internal components. Thus, periodically flushing out the heater can be an important part of increasing the lifespan.
If a water heater is neglected the sediments can stick together at the bottom of the tank and from here, it will become difficult to remove them. However, if it’s still not done, the sediments can start damaging the internal components and at the end of the day, you’ll have to replace the entire system.
This is the reason why flushing your water heater seems to be very important. All the water heaters generate some amount of minerals to treat with the water and make the sediments soluble. But if you have a large number of sediments as well as limestone, the groundwater will start eroding the components.
As a result of this, it will start picking up the calcium and the magnesium deposits. This will result in creating hard water. Since it sits at the bottom, this water can create multiple problems for any heater.
You can face multiple issues like gas leakage and uneven heating in the case of gas heaters. In some of the electric heaters, you may face other issues like heating elements being worn out. The drain valve too will be blocked if the sediments are formed in excessive amounts.
- TANKLESS WATER-HEATING CLEANING KIT: The My PlumbingStuff Tankless Water Heater Flushing Kit is perfect for maintaining any tankless-style water heater. It includes 5-foot SS hoses, a 32-ounce bottle of FLOW32 Descaler, a Zoeller 42-0007 Floor Sucker pump, and a 5-gallon bucket.
- HELPS MAINTAIN EFFICIENCY: This tankless water-heater flushing kit should be purchased with every new or existing tankless water-heater system. By flushing the water heater as recommended by the manufacturer, you’ll ensure optimal efficiency, reduce debris buildup, and improve the quality of water.
- J.C WHITLAM FLOW32 DESCALER: FLOW-AIDE is a nonhazardous, noncorrosive, nontoxic, and biodegradable descaler that is heavily fortified with wetting and penetrating agents that actually dissolve water scale, lime, mud, rust, and other water-formed deposits from portable water-heater and tankless systems.
- EVERYTHING YOU NEED: This tankless water-heater cleaning kit includes everything you need to fully maintain your water-heating system. It comes with step-by-step instructions that are easy to follow, and it connects easily to the tankless isolation valves using the supplied 5-foot SS hoses.
- OVER 100 YEARS OF QUALITY-DRIVEN PLUMBING SOLUTIONS: At My PlumbingStuff, we have real plumbing and heating experts working behind the scenes to bring you the most trusted products for your home’s DIY needs. We offer indoor and outdoor fixtures and have proudly been a 4th-generation family business within the plumbing industry for over 100 years.
Some Frequently Asked Questions
Q1. How to get the limescale out of the water heater?
Ans. The above-mentioned steps and procedures will help in this case. The process mentioned above is to remove the lime and calcium deposits, so it will also help in removing the limescale out of the water heater. Try the above-stated steps only.
Q2. Can you put CLR in the water heater?
Ans.Yes, you can put CLR onsite hot water tank. This is useful because every day the minerals get deposited inside the tank and cleaning the water tank is tough. To make the process the CLR helps. CLR stands for calcium, lime, and rust. This comes in small spray bottles. But these are also sold in gallon-sized bottles which are perfect for cleaning the water tank.
Q3. How to Descale a hot water dispenser?
Ans. To descale a hot water dispenser, follow these steps:
1. Fill the dispenser to the max level and then empty it in a cup.
2. Add citric acid to the hot water cup.
3. Now fill the dispenser with this hot water.
4. Drip all the water into the cup.
5. Discard this water. And repeat steps 2, 3 and 4 until the water level is at the minimum mark.
6. Open the lid and empty the remaining water from the reservoir of the dispenser.
7. Rinse the water dispenser by filling it with clean water.
8. Fill your dispenser with fresh water to the max level and your water dispenser is new as before.
Do dispenser cleaning once in a month. Especially if you live where hard water comes to your home.
Q4. Why does my hot water tank make Popping noises?
Ans. If this happens, this means your tank needs draining and flushing. If you don’t do this the water tank efficiency of heating water will get low and then, in the long run, you will need to change the hot water tank fully.
The popping noise is caused by the water boiling underneath the tank. The noise coming from the water tank is harmless alone but the sediments can cause damage to the electric heating element and eventually cause a leak. To fix this drain and flush the hot water tank.
Q5. How do I Disinfect my hot water heater?
Ans.To disinfect the hot water heater you need Clorox bleach. This bleach is used when a bad smell or bad taste starts coming from your water. Follow the steps to disinfect the water heater:
1. Empty the water heater by connecting the hose and turn on the drain on the bottom of the tank. Let the water drain into a bucket.
2. Turn the water heater off.
3. Turn off the cold water valve present on the top.
4. Mix the bleach with 2 gallons of water to dilute it.
5. Connect a second hose to the nearby faucet.
6. Place the end of the hose connected to the water heater drain into the bleach solution.
7. Turn on the water heater drain and turn on the faucet to which hose is connected. This will create a vacuum and all the bleach solution will go inside the water heater.
8. Open the cold water valve and let the water flow. Once the water starts coming out, turn it off.
9. Wait for 10-12 hours and then drain the bleach solution from the water heater.
Make sure you use a normal non-scented bleach in this process. Also, make sure it does not contain any added chemicals.
Q6. How do I prevent sediment in my water heater?
Ans.You can do the following steps:
1. Flushing Your Unit
This is a good technique. You can do this twice a year.
2. Vinegar Soak
You can use vinegar that will help to get rid of water stains and sediments. You can check the above-mentioned steps to add vinegar in a water heater. The process is not very tough and it requires only 6 hours.
3. Water Softener Installation
Water softener installation is good for you to use your water heater regularly and for long hours. If you want to use a hot water heater for a long time then this technique is good for you. But water softener solution is costly and it has costly maintenance.
- TANKLESS WATER-HEATING CLEANING KIT: The My PlumbingStuff Tankless Water Heater Flushing Kit is perfect for maintaining any tankless-style water heater. It includes 5-foot SS hoses, a 32-ounce bottle of FLOW32 Descaler, a Zoeller 42-0007 Floor Sucker pump, and a 5-gallon bucket.
- HELPS MAINTAIN EFFICIENCY: This tankless water-heater flushing kit should be purchased with every new or existing tankless water-heater system. By flushing the water heater as recommended by the manufacturer, you’ll ensure optimal efficiency, reduce debris buildup, and improve the quality of water.
- J.C WHITLAM FLOW32 DESCALER: FLOW-AIDE is a nonhazardous, noncorrosive, nontoxic, and biodegradable descaler that is heavily fortified with wetting and penetrating agents that actually dissolve water scale, lime, mud, rust, and other water-formed deposits from portable water-heater and tankless systems.
- EVERYTHING YOU NEED: This tankless water-heater cleaning kit includes everything you need to fully maintain your water-heating system. It comes with step-by-step instructions that are easy to follow, and it connects easily to the tankless isolation valves using the supplied 5-foot SS hoses.
- OVER 100 YEARS OF QUALITY-DRIVEN PLUMBING SOLUTIONS: At My PlumbingStuff, we have real plumbing and heating experts working behind the scenes to bring you the most trusted products for your home’s DIY needs. We offer indoor and outdoor fixtures and have proudly been a 4th-generation family business within the plumbing industry for over 100 years.
Wrap Up
This was all from our side on how to clean a hot water heater with vinegar. If you have any other ways of doing this then we would be glad to hear it from you. If you have any other doubts and queries then you can let ask in the comments section or ping us. We have many more such articles in our blog section. Do give them a read. Let us know if you need any other article on demand. We would be happy to fulfill it. Here are some more uses of Vinegar in Household DIY.